A Brief Guide to the Three Passes Route
A solo 4-day adventure on a classic Southern Alps traverse
Many moons ago, the Three Passes Route held a certain mystique and ‘out of reach’ vibe for me. As suggested succinctly by the name, the route has three mountain pass crossings: Harman (1321 m), Whitehorn (1753 m), and Browning / Noti Raureka (1411 m). The biggest sticking point for me was Whitehorn Pass and its permanent snowfield. Route descriptions refer to needing, at minimum, an ice axe and crampons and the requisite alpine skills.
As the years have passed and with more experience under my belt, the Three Passes Route came back onto my radar. And so it was, as 2022 was coming to an end, that I decided to set out on a solo mission to complete this classic traverse of the Southern Alps.
Video highlights from the Three Passes Route (thumbnail image shows the approach to Whitehorn Pass)
Unfortunately the preparation didn’t quite go to plan. My right knee has always been a bit of a problem following various sporting injuries (it barely has any cartilage left after a couple of operations). Most of the time it’s just niggly, but for some reason in the weeks leading up to this walk it decided to play up big time. As in a lot of pain and reduced movement, even when carrying out ordinary duties. Postponement crossed my mind, but being on Christmas holidays and with a perfect weather window looming I decided it was too good an opportunity to miss. Off to the pharmacy I went for a big pack of Ibuprofen.
I elected to tackle the route from east to west. It can be done either way, but I’d read plenty of reports suggesting heading west is a bit more straightforward. In particular this direction avoids a very steep descent down Browning Pass / Noti Raureka. East to west also involves a net elevation loss (starting at 631m at Bealey and finishing at 92m at Lake Kaniere), meaning ever-so-slightly less effort is required 😂.
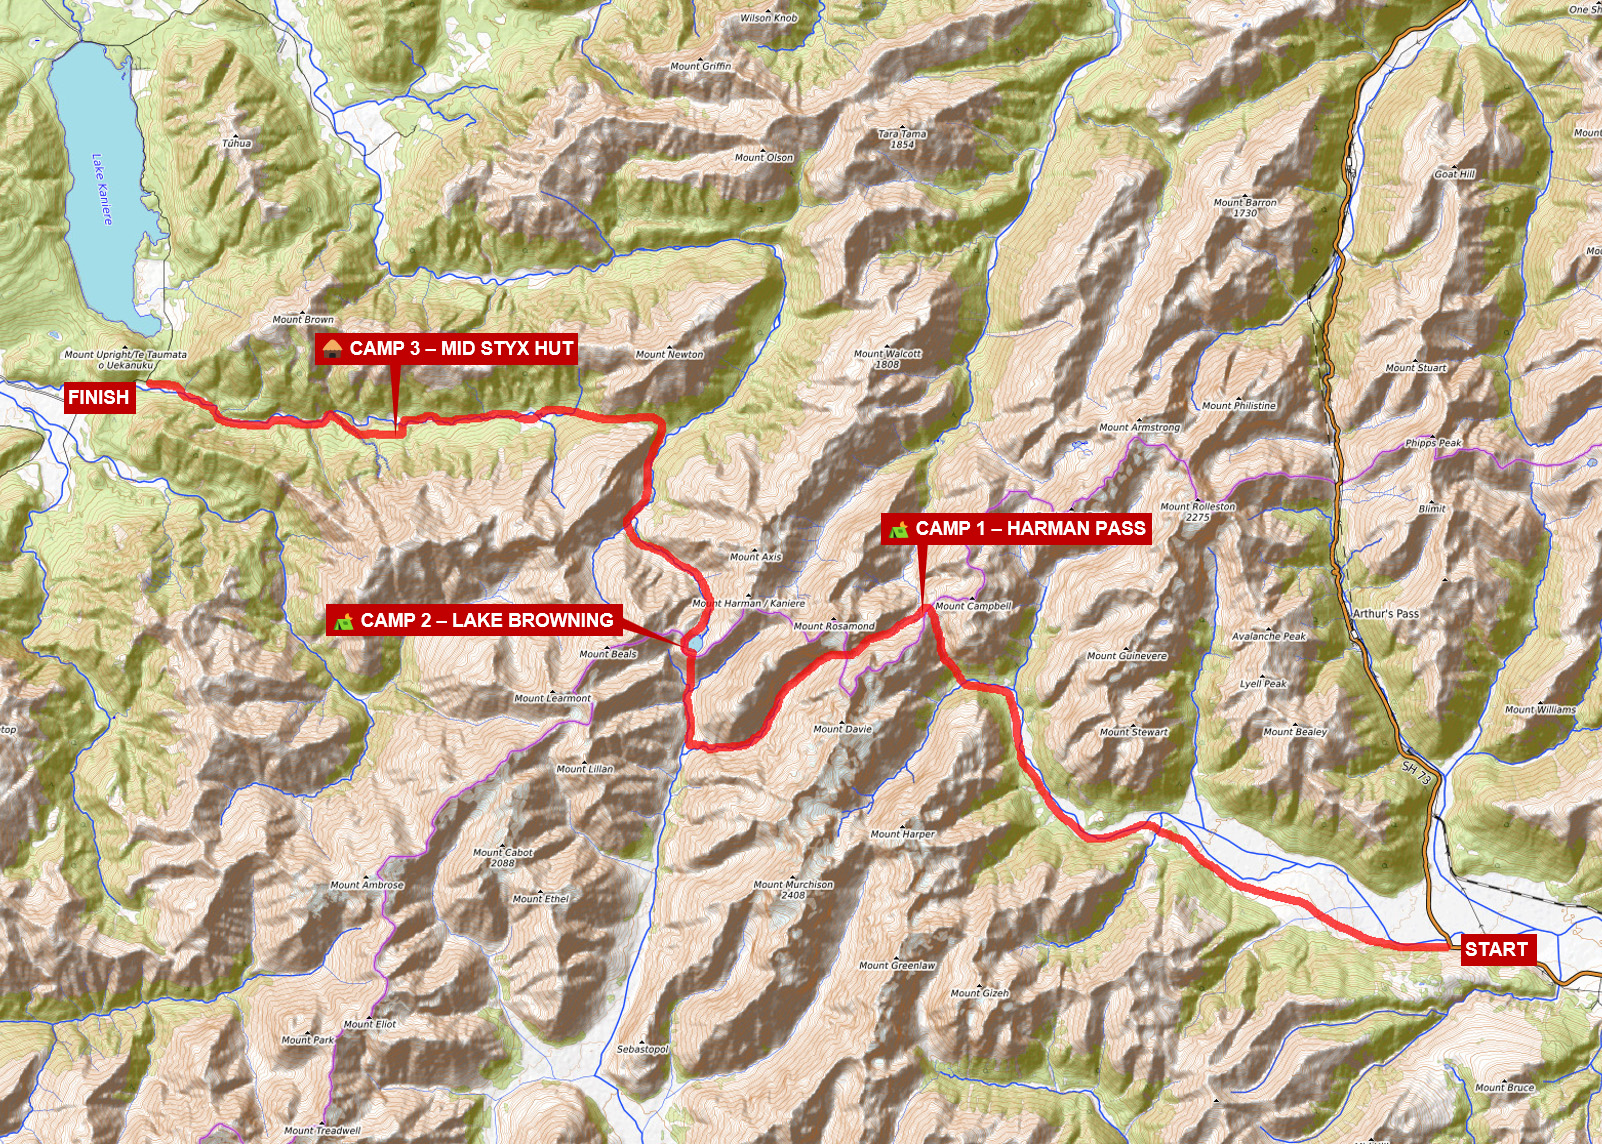
My route map (click for larger version)

Why east to west (and avoiding this descent) is generally recommended
Day 1
My lovely wife dropped me off at Bealey just before 7:00am on 26th December. There’s a marked and easy to follow route most of the way up the Waimakariri River, which occasionally strays into the forest to avoid wading through river channels. In fine weather I recommend going straight up the river wherever possible as it’s much faster (wet boots being the only downside).

Heading up the Waimakariri River valley
Around 7 hours in I reached Carrington Hut (36 bunks) and had a late lunch. This is pretty slow going (DOC estimated time is 4-5 hours), but in my defence I was carrying a heavy pack (~23kg), the day was stifling hot, and I’d made quite a few stops for photography. Soon after the hut I forded the cold and swift White River (the Clough Cableway was out of action) and then left behind any semblance of a track to clamber up the spectacular Taipoiti River gorge. The gorge had only recently become accessible; over winter and spring it accumulates snow avalanche debris which can block progress. The ascent up the gorge requires several river crossings and a fair amount of boulder hopping.
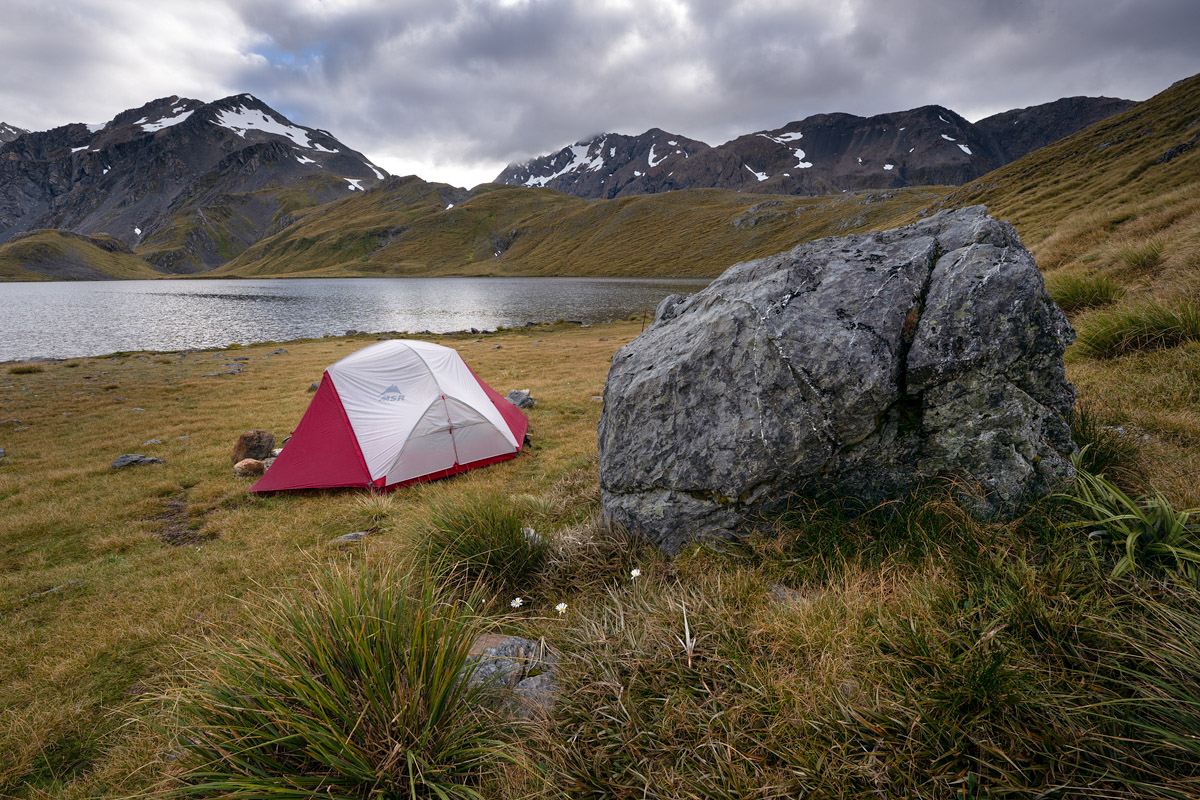
After an 11-hour day I finally reached Harman Pass, and just a few hundred metres on, found an idyllic spot to pitch my tent beside the sparkling Ariel’s Tarns. A beautiful sunset, a quick dinner, and I was off to slumberland. Thankfully, although my knee was in a fair amount of pain, it was holding up well and felt strong.

The impressive confines of the Taipoiti River gorge
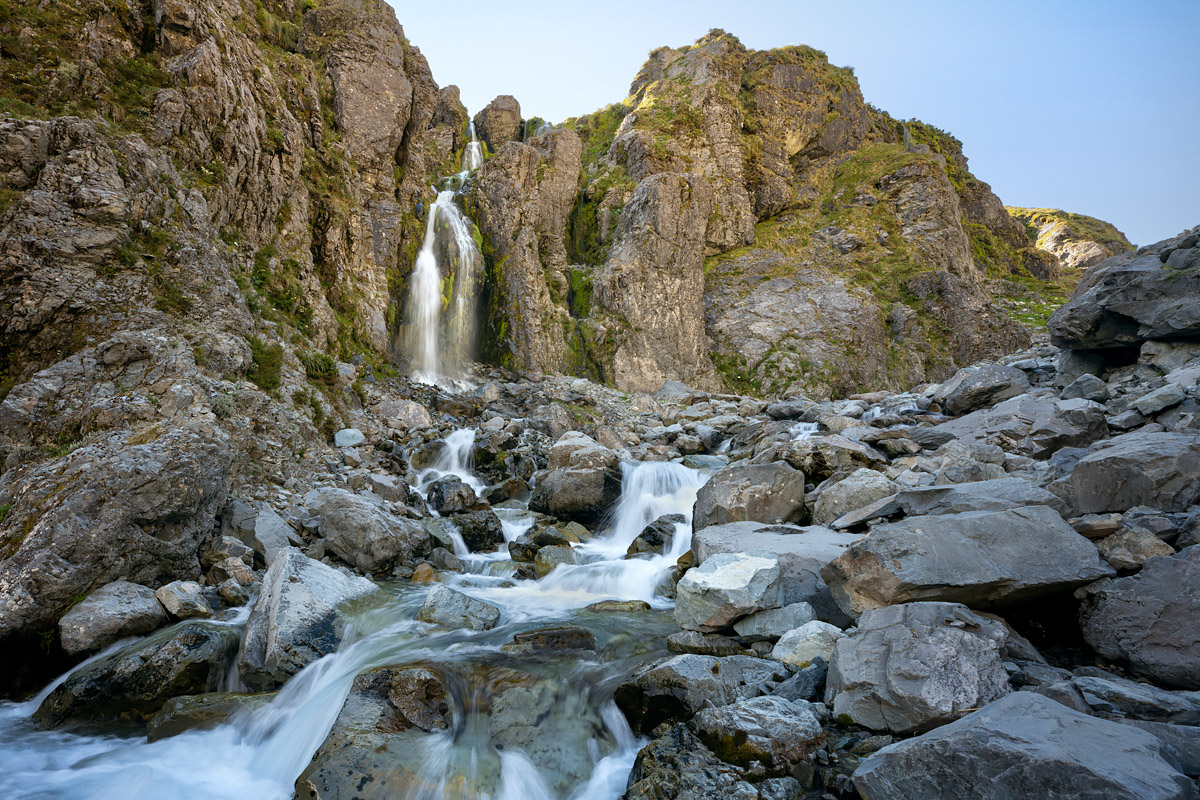
Several spectacular waterfalls drop into the Taipoiti River gorge

Sunset at Ariel’s Tarns (my tent is just visible centre-right)
Day 2
The next morning dawned clear but it wasn’t long before valley fog began to roll in. I set off just before 8:00am and around 30 minutes later reached the toe of the Whitehorn snowfield. Here the meltwater stream emerges from a snow cave; care is required while on the snow to stay away from the submerged river and avoid collapsing its roof.
Given it was early summer, and the forecast had been for warm weather, I expected the snow to be soft and easy to walk on. I’d also researched several trip reports and YouTube videos confirming this likelihood. It was on that basis I‘d made the decision to embark on this trip planning to get through this section with microspikes and a walking pole, but also with the mindset that I’d not proceed if the conditions were icier than expected. As it turned my predictions of slushiness proved correct and the climb was reasonably straightforward. The slope angle on the eastern approach to Whitehorn Pass is relatively mild, but I could see how it’d be more treacherous in icy conditions. Multiple large boulders on the snow surface served as a reminder that the valley is not a place for lingering.

A foggy view back down valley from Whitehorn Pass towards Harman Pass

Cronin Stream emerging from the leftovers of winter’s snow
It took me a couple of hours to reach Whitehorn Pass from my campsite. The cloud continued to roll in and obscure the views, so with a big day ahead, I pushed on down the Cronin valley. The initial descent off the western face of the pass was steep and rocky but I soon encountered more snow fields. Eventually the snow disappeared and the route became a boulder bash, before picking up a barely discernible path weaving through sub-alpine scrub and tussock. Several side streams need to be crossed, and eventually the main branch of Cronin Stream needs to be forded before it disappears into a narrow gorge. Here a marked track climbs up the hillside before descending again to Park Morpeth Hut (6 bunks). It’s now 3:30pm and I’ve spent roughly 6 hours getting down the Cronin valley.
A quick snack and it was time to move on. By now it was fully overcast and cloud shrouded the peaks. I made my way up the true-left (eastern) bank of the Wilberforce River towards the foot of Browning Pass / Noti Raureka. In earlier times the pass was regularly used by Māori and European settlers to cross the South Island; at one point it was even looked at as a potential road crossing of the alps. Very little semblance of a former bridle path now remains, having been engulfed by many decades of erosion.
After two long days on my feet I was feeling pretty exhausted at this point, and as such I found the ~400m climb to be rather arduous. The top half in particular is steep and loose underfoot. Slightly disconcerting were several route markers lying in places where they shouldn’t be, having dislodged and tumbled off bluffs. I could certainly see why a descent isn’t preferred. Near the top I disappeared into the cloud and the temperature dropped considerably. Wind whipped furiously over the pass and visibility was down to a few metres.
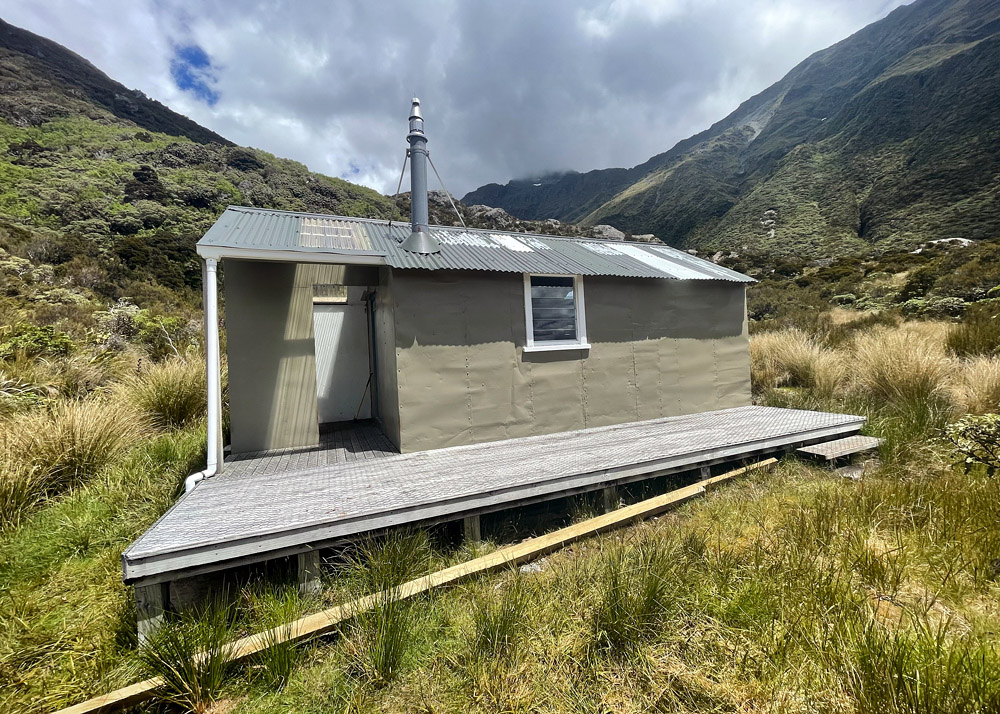
Park Morpeth Hut (owned by the Canterbury Mountaineering Club)
I reached my campsite on the shore of Lake Browning / Whakarewa at around 7:00pm. Another 11-hour day! Knackered once again, and with zero visibility not providing any opportunities for exploring, I called an early night and slipped into my sleeping bag. My alarm was set for 5am and the hope was it’d clear by the morning.
Day 3
I wasn’t disappointed.

Lake Browning at 5:24am, captured just before the breeze arrived and removed the reflection
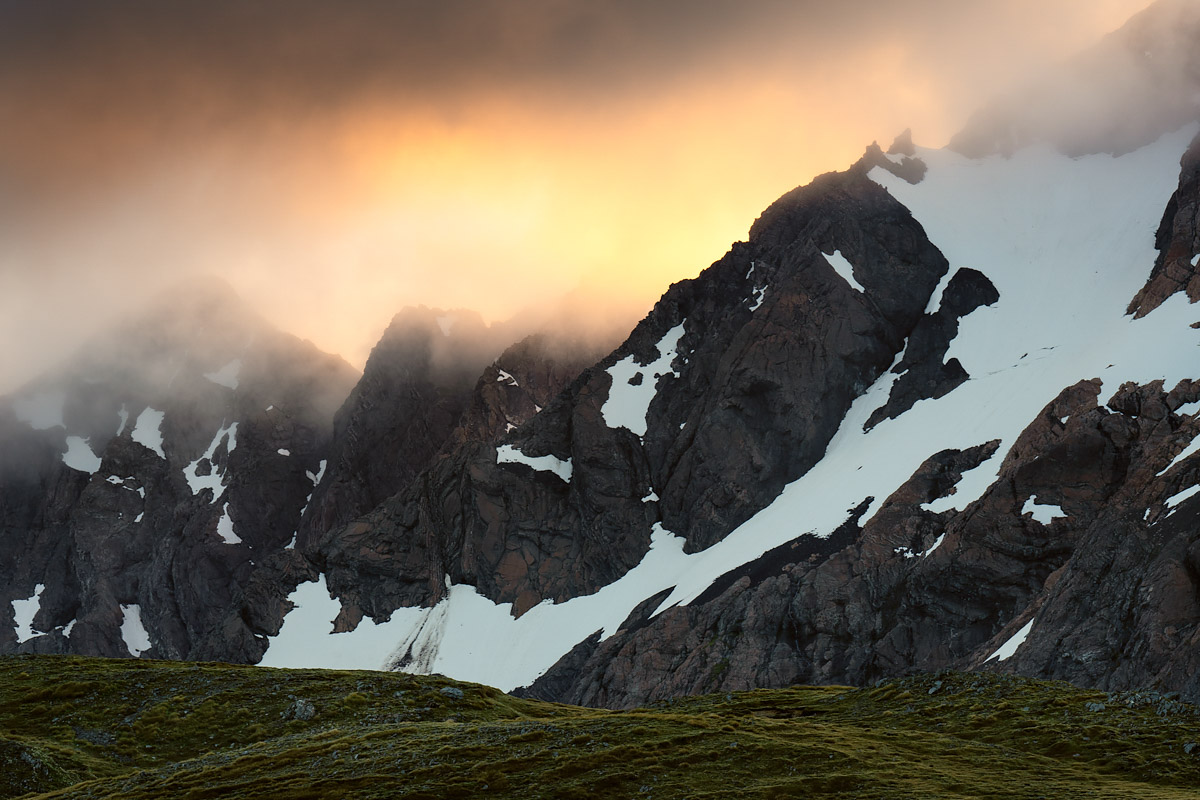
Sunrise lighting up the clouds hugging the peaks to the east of Lake Browning / Whakarewa

The Wilberforce River winds its way down to meet the Rakaia (viewed from Browning Pass / Noti Raureka; note track marker bottom-right)

Lake Browning / Whakarewa sits at 1360 m elevation

A long exposure of a small tarn located near Lake Browning / Whakarewa
My campsite beside Lake Browning / Whakarewa
At 9:30am I got underway. The marked route initially skirts around the western fringe of the lake before dropping steeply into the headwaters of the Arahura River, famed for its pounamu (greenstone). Once down in the floor of the valley it was a case of picking my way down the bouldery river bed, crossing the channels multiple times to make for faster progress (all around knee to thigh deep when I went through).
Around 2.5 hours in the route leaves the bed of the Arahura and briefly ascends a side creek to reconnect with the former bridle path. In some parts the track is a doddle, in other parts it has fallen to bits and a scramble is required. Overall, it proved to be much slower going than anticipated.
A sun-drenched Harman Hut (6 bunks) was my lunch spot. Soon after the path leads to a long swingbridge draped high above a tumbling Harman River. Then it’s back onto the bridle path, again with some good parts but also with some eroded sections.
Just before Styx Saddle there’s a choice of continuing down either the Arahura or Styx Rivers. My plan was to head down the Styx, but with the knowledge that parts of it had been severely damaged by flooding in recent years and would be slow going. (The Arahura option is a lot longer distance-wise, but from what I’ve read, easier and quicker overall.)
Styx Saddle (770 m) is adorned in tussocks, some of which towered over my head and swallowed the track and markers. Hidden holes underfoot provide a few heart-in-mouth moments. The forest is soon reached but I also found the track here to be overgrown and challenging to follow, at least for the first few hundred metres. It eventually improved, but as I was becoming quite accustomed to by now, progress was taking a lot longer than expected.
Harman Hut (6 bunks)

Grassy Flat Hut (10 bunks)

The towering tussocks of Styx Saddle
After fording the main branch of the Styx River I reached my intended destination of Grassy Flat Hut (10 bunks). It was 4:30pm and I’d been on the move for 7 hours. Given how much slower the terrain had been so far, and with the knowledge it was only likely to get worse, I made the decision to push on down the valley. I’d arranged for my wife to pick me up at the roadend at midday the following day so this decision was made to ensure I’d get there in time. My revised destination was to be Mid Styx Hut (4 bunks).
The section immediately below Grassy Flat, much like the earlier part of the day, has a mixture of grades. Flood damage and slips need to be navigated at several points, and in one location, the track (if you can even call it that) climbs high above the river to bypass a major washout.
Around 2.5 hours below Grassy Flat Hut I reach the point where I need to ford the Styx River again to get across to Mid Styx Hut. By now the river has accumulated a much larger volume of water, and even during these low flow summer conditions, it was nearly up to my waist at the deepest point.

The Styx River at the fording point to access Mid Styx Hut
After around 30 minutes, which included a climb up a steep forested terrace, I reach Mid Styx Hut. It’s 7:45pm and a 10-hour walking day is done.
Day 4
At 7:00am I set off to ensure I’d reach the roadend in time. Initially the track from the hut is easy to follow, however, the descent into Tyndall Creek is gnarly. Ropes assist in a couple of sections, but there are other drops without ropes which could certainly benefit from them (I was thankful it wasn’t raining and slippery). Once in the creek bed the terrain becomes easier, save for dodging overgrowth (including ongaonga / tree nettle) and navigating slimy rocks.
After rejoining the Styx River (around 2 hours in) the track heads down the true-left. Although again, in places calling it a track is unfair to other tracks as it can be very rough. Eventually the valley widens and with it the route begins to traverse some pleasant grassy flats and walking speed increases. With around 2 km to go the route passes across to the true-right, necessitating a fording of the Styx, made easier at this point by the river being channeled into multiple braids. The last section is on an old farm track and quick going. At 11.30am (4.5 hours from Mid Styx Hut) I reach the Styx Track carpark.

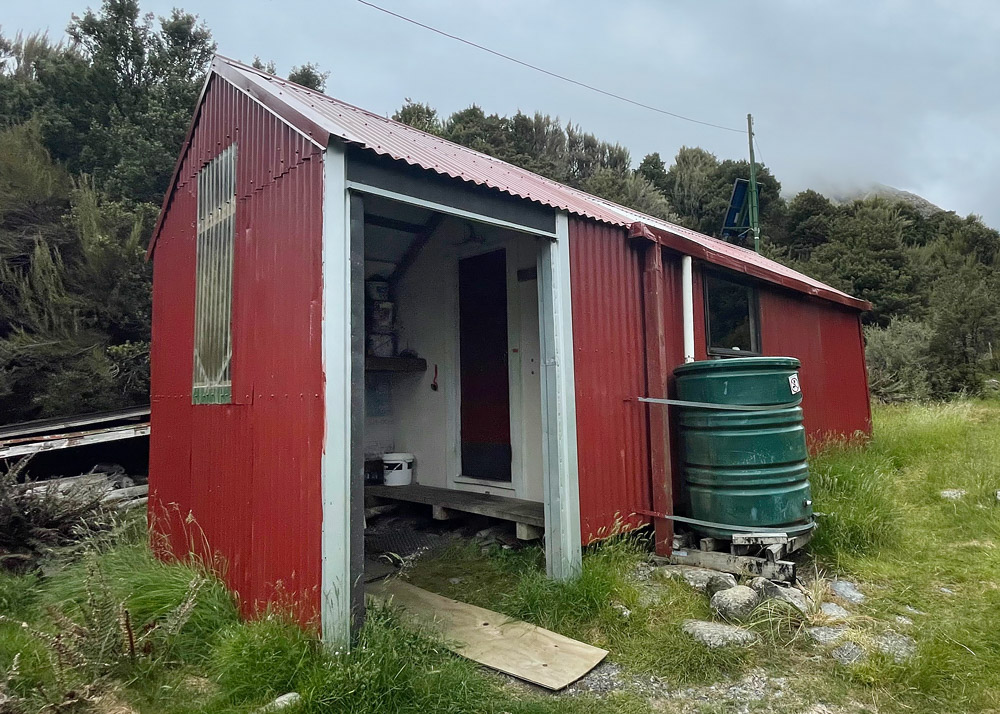
Mid Styx Hut (4 bunks)
Mission accomplished!
The Three Passes Route is everything I thought it’d be and more. Absolutely stunning scenery, uncrowded landscapes (I saw 7 other people in total), rough and untracked terrain, and the diversity of experiencing a 55km cross-section of the Southern Alps. My body (including dodgy knee) was feeling it bigtime after four huge days with a heavy pack, but conquering all was the wonderful feeling of completing this amazing trip all on my own.
If there’s to be a next time (and I hope there is), I’d probably be inclined to turn the trip into a 5 or 6 dayer. That’d help make the walking times on each day a little more manageable, as well as providing more opportunities for photography and exploring.
Thanks for reading this far and if you have any questions, please fire away in the comments!
Leave A Comment