A Brief Guide to RAW Photography
In the microseconds after pressing your shutter button all those bits and bytes start flowing from your camera sensor and down a pipeline towards your memory card. But soon there’s a junction.
To the left there’s a sign saying “JPEG”. The pipeline quickly narrows and the data races onto a conveyor belt and through a series of noisy gears, cogs, wheels and big stampy things. At the controls of the machines sit a dozen stressed-out robots, pushing buttons and pulling levers as fast as they can. In the panic to reach a consensus on how the image should look one of the robots turns the wrong dial and the conveyor belt speeds up. The assembled image shoots off the end of the belt and smashes into the wall on the far side of the room, narrowly missing the delivery chute to the memory card. A significant number of bytes fall off and smash on the floor, never to be recovered. One of the robots hops up from his desk, and feeling pretty despondent about the whole situation, shrugs his shoulders and with a solid boot kicks what remains of the image down the delivery chute. The image arrives looking colourful and dazzling, but its got some dents and scratches which are gonna be difficult to repair or enhance.
Had the data taken the pipeline to the right, under the “RAW” sign, it would have flowed out onto a wide meandering plain surrounded by vibrant green grass and daffodils. Lambs frolic on the banks and willow trees sway gently in the breeze. The image flows blissfully towards the golden light on the horizon and arrives on the memory card feeling fully relaxed and bursting with unrealised potential. All it needs now is some further assembly by its creative owner.
Or something like that anyway.
In a nutshell, a RAW file means more data, more quality, and more creative control. Most cameras, and even some phones, allow you to choose JPEG or RAW as the recording option (sometimes you can even do both at the same time). If you’re after maximum quality for processing and eventual printing then RAW is your option. On the other hand, if you’d prefer the camera to make all the creative decisions, then JPEG is your answer.
Here are some examples of why you should shoot RAW. Use the sliders to see the before and after effect!
Exposure recovery
RAW files provide up to 16,384 levels of brightness (in a 14-bit file). JPEGs are only 8-bit so that means just 256 brightness levels. All that extra RAW data allows you to do a lot more exposure adjustments while retaining quality. In particular it helps draw out extra information from the brighter and darker areas of the image while maintaining smooth tonal transitions and avoiding too much grain and noise.
That said, getting the capture as right as possible in the field is still incredibly important as you can’t rely on a RAW file to save a dud image. Generally speaking with modern camera sensors it’s easier to recover data from the shadows than it is from the highlights. That’s why these days many landscape photographers, myself included, lean towards under-exposure at the time of capture.


Before: Image exposed to retain highlights in sky but resulting in dark foreground. After: Information recovered in the foreground through Graduated Filter tool set at Exposure +3.2, Shadows +30, and Whites +20.


Before: Image exposed to retain shadow detail in the forest but resulting in the river flow being over-exposed. After: Information recovered in the foreground through Graduated Filter tool set at Exposure -1.0, Whites -20, Dehaze +40.
If all that extra information in one RAW file wasn’t enough, then with post-processing software it’s even possible to harness the data of a series of exposure bracketed RAW images. That means in a scene with high dynamic range you can capture the darkest of darks and lightest of lights, then back at the computer combine all that data into a single file for processing. In Lightroom this is done through the HDR function (Photo > Photo Merge > HDR).

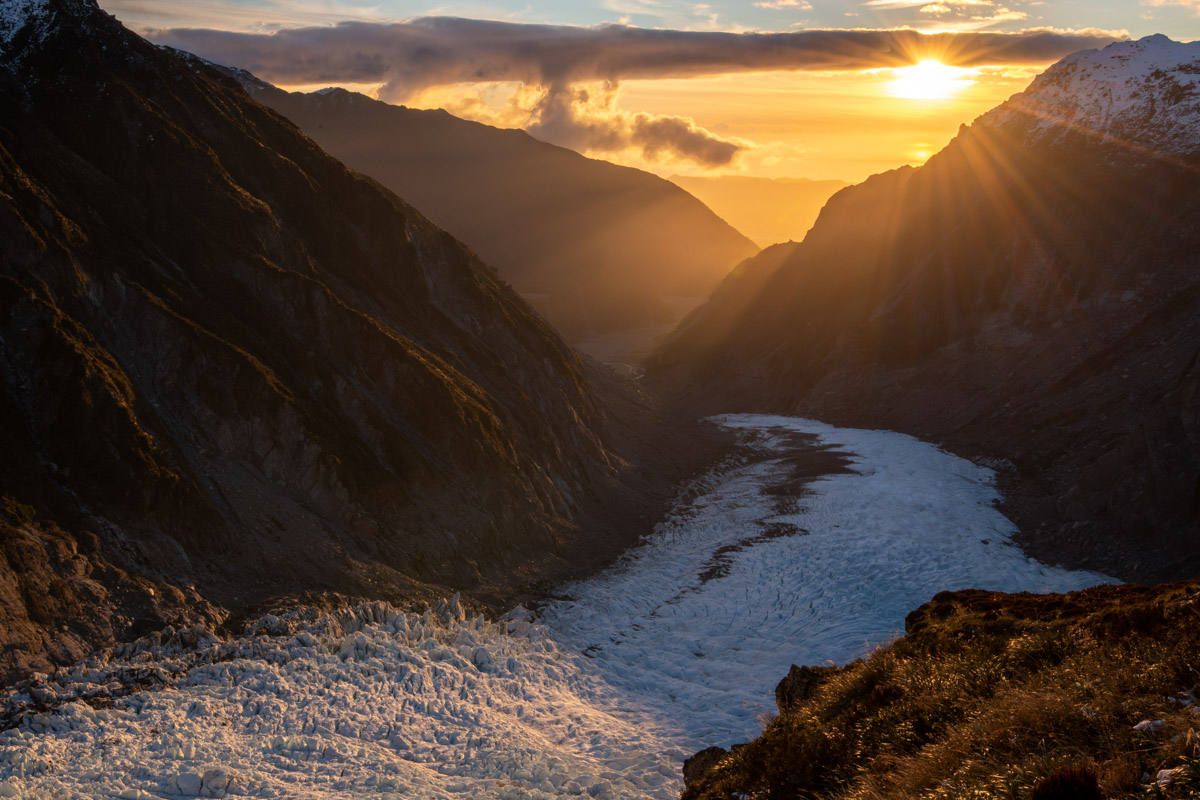
Before: Four images taken at different exposures to capture the full range of light from the brightness of the sun to the darkness of the valley. After: The four images merged into a single file, which can then be used for further processing (this example has been produced using the fully automated settings under the HDR photo merge function in Lightroom)
Colour depth
In a similar fashion to brightness levels, RAW files hold a lot more colour information. We’re talking 4.8 trillion possible colours (in a 14-bit file), whereas an 8-bit JPEG has only 16.8 million. Put another way, for every one possible shade of colour in a JPEG file there’s up to 262,144 shades in a RAW file.
While a JPEG still has plenty of colour information (and bearing in mind the human eye can apparently only distinguish around 10 million colours), a RAW file still provides significantly more headroom for processing, especially in those areas with smooth colour transitions.
White balance
White balance is the colour ‘temperature’ of light. Under warm light a white object can look yellow and under cool light it can look blue. Sometimes that can produce a desirable effect, but sometimes we just want our whites to look white. Unfortunately those little robots in your camera don’t always make great decisions.
With RAW shooting it isn’t necessary to get the white balance settings correct in the field as this can be set with a touch of a button back at the computer. With a JPEG the camera bakes the colour temperature into the file at the time of capture. While you can still try changing the white balance of a JPEG later on it’s done without the benefit of all that extra brightness and colour data. Result: degraded image quality.

Before: Cool white balance (5,500 Kelvin). After: Warm white balance (11,000 Kelvin). No right or wrong here, just personal preference!
Sharpness and noise
You’re probably getting the idea by now, but with JPEG your camera is making the decisions about the level of sharpness and noise reduction. Typically those stressed-out robots want to make this decision quickly (before the next image arrives on the conveyor belt) and don’t especially care about tailoring the solution to the specific image in question.
With RAW, you get to make those decisions yourself and at your own pace. Importantly, you also get the advantage of more powerful processing and software at your computer, which, you guessed it, will ultimately lead to better image quality.
Downsides
A choice to shoot in RAW is also a choice to process. As explained above, the camera hasn’t done any processing so RAW images can look fairly bland straight off the memory card. Also, if you intend sharing the images anywhere then the file will need to be converted to a shareable format such as JPEG. To do these tasks you’ll need software like Adobe Lightroom, Skylum Luminar, or Capture One (to name but a few). Basic RAW editing software is also in the box with most higher-end cameras (for example, Nikon uses Capture NX-D).
All that extra data means RAW files are larger too. With my Nikon D850 a single compressed (but lossless) 14-bit RAW file averages around 50 MB. At the highest JPEG settings an equivalent file is under half the size at around 20 MB. With the cost per MB (/GB) of memory cards and hard drives being relatively cheap these days I personally don’t find this to be an issue.
Questions?
Shoot me feedback or questions in the comments below!
Leave A Comment